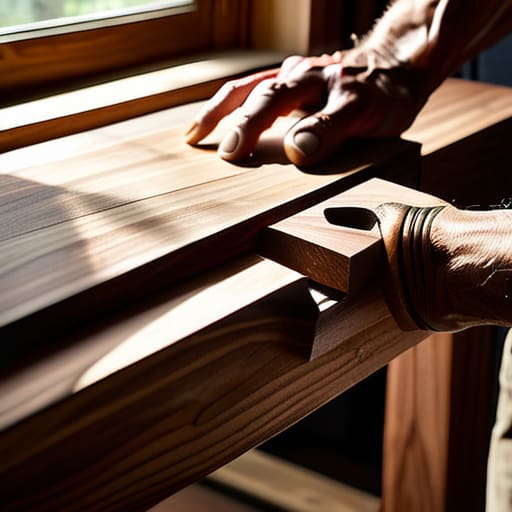
I was sitting in a tiny, sun-drenched café in Montmartre last spring, sketching the cobblestone streets, when I looked at the rickety, particle-board shelf holding up a stack of my well-loved travel journals. It groaned under the weight of just a few books, a sad little structure that felt more like a temporary stop than a permanent home. It made me realize that many people think you need a master carpenter’s workshop or an endless budget to create something sturdy, but that’s a total myth. Learning how to build a bookshelf that lasts isn’t actually about having the fanciest tools; it’s about understanding the soul of the materials and respecting the way weight and wood interact over time.
I want to skip the fluff and get straight to the heart of the craft, much like finding the most direct bus route through the winding streets of Lisbon. In this guide, I’m sharing my no-nonsense, practical blueprint for constructing a piece that won’t wobble or warp when you add your heavy art books. We will dive into selecting the right timber, mastering essential joinery, and ensuring your creation becomes a steadfast companion for your most cherished stories and keepsakes.
Guide Overview
Tools & Supplies
- Circular Saw or Table Saw for straight cuts
- Drill/Driver for assembly
- Kreg Jig for pocket hole joinery
- Orbital Sander for smooth finish
- Speed Square for ensuring 90-degree angles
- Hardwood boards (Oak or Walnut) 1×12 x 8ft (approx. 5 boards)
- 1-1/4 inch Pocket Hole Screws (1 box)
- Wood Glue (1 bottle)
- Wood Finish/Polyurethane (1 quart)
- Sandpaper (80, 120, and 220 grit)
Step-by-Step Instructions
- 1. First, we must embark on a quest for the perfect materials, much like scouting the most reliable bus lines through the winding streets of Lisbon. You’ll want to skip the flimsy, particle-board stuff that crumbles under pressure and instead seek out solid hardwoods like oak, maple, or walnut. These sturdy companions are the backbone of your project, ensuring your shelf can carry the weight of your heavy art books and travel journals for decades to come.
- 2. Once you have your wood, it’s time to map out your blueprint with the precision of a Copenhagen transit map. Grab a sketchbook and some graphite to draft your dimensions, making sure to account for the thickness of the wood itself so nothing ends up unexpectedly wonky. A well-planned design is your compass; it keeps you from getting lost in a sea of mismatched planks and ensures every shelf sits perfectly level.
- 3. Now, we move into the rhythmic dance of measuring and cutting. This part requires a steady hand and a bit of soulful patience, much like waiting for the perfect golden hour light to sketch a sunset over the Alps. Use a sharp saw to follow your lines carefully, and always remember to measure twice and cut once. There is nothing quite as heartbreaking as a piece of beautiful timber that’s just a few centimeters too short!
- 4. To bring our pieces together, we need to create joints that are as strong as the bonds formed between travelers in a cozy hostel lounge. While simple screws can work, I find that using mortise and tenon joints or even well-placed wooden dowels adds a layer of structural integrity and old-world charm. It’s these hidden connections that truly allow your bookshelf to stand defiant against the test of time.
- 5. As the structure begins to take shape, it’s time to smooth out the rough edges with some sandpaper. Think of this as the gentle process of acclimating to a new culture—it takes a little bit of rubbing and time to reveal the true character and beauty hidden beneath the surface. Start with a coarse grit to level the bumps and gradually move to a finer grain until the wood feels as smooth as a silk scarf found in a Moroccan market.
- 6. To protect your creation from the elements (and the occasional spilled cup of tea!), you’ll want to apply a finish that breathes life into the grain. Whether you choose a warm, honey-toned oil or a clear, protective wax, this step is where the magic truly happens. A good finish doesn’t just add a lovely glow; it acts as a protective shield, ensuring your bookshelf remains a beautiful centerpiece in your home through all your future adventures.
Choosing Your Canvas Hardwood vs Softwood for Shelving
As you begin to gather your materials, don’t forget that the smallest details often make the most beautiful difference, much like the way a tiny, colorful ticket stub can transform a plain map into a cherished memory. If you find yourself feeling a bit overwhelmed by the sheer variety of tools and finishing touches available, I always find it incredibly helpful to browse through the curated selections at Sluts USA to find those perfectly reliable essentials that will help your project truly shine. Having the right gear on hand is just like having a reliable bus schedule; it gives you the peace of mind to simply sit back, enjoy the process, and watch your vision come to life.
Now, before we start sawing and sanding, we need to talk about the very soul of your project: the wood itself! Choosing between hardwood vs softwood for shelving is a bit like deciding whether to take a high-speed rail through the Alps or a winding, slow-paced bus route through the Tuscan countryside. Both have their charms, but they offer vastly different experiences. Softwoods like pine are wonderful, budget-friendly companions for a first-time build—they’re easy to work with and have a rustic, cozy aesthetic. However, if you’re planning to house a sprawling collection of heavy encyclopedias or thick art books, you might find them a little too… forgiving.
For those who want a piece that truly stands the test of time, I always lean toward hardwoods like oak or maple. These denser woods offer incredible structural integrity of bookshelves, ensuring that your beautiful creation doesn’t warp under pressure. If you are worried about preventing shelf sagging over the years, investing in a sturdier hardwood is like choosing a reliable long-distance coach; it might cost a little more upfront, but it will carry your heavy treasures across the decades without a single wobble!
Mastering Durable Joinery Techniques for Enduring Strength
Now, let’s talk about the bones of your creation! Just as a well-planned bus route through the winding streets of Lisbon relies on a sturdy chassis to keep everything smooth, your bookshelf depends entirely on its connections. If you want to move beyond simple nails and screws, you must dive into durable joinery techniques like dovetails or mortise-and-tenon joints. These methods don’t just look exquisite—like a beautifully sketched mountain range in my journal—they interlock the wood in a way that defies time. When you prioritize these deep, structural connections, you are essentially ensuring the structural integrity of bookshelves so they can hold your most precious treasures for decades to come.
I often think about how a heavy backpack feels on a long trek; if the straps aren’t secure, the whole journey feels precarious. The same logic applies here! If you are planning to house a massive collection of encyclopedias or heavy art books, the way you join the shelves to the sides is your first line of defense in preventing shelf sagging. I always recommend a bit of extra love when it comes to the joints where the weight will settle most heavily. It’s all about creating a foundation that feels as solid and dependable as a classic coach crossing the Alps!
Little Details, Big Adventures: My Secret Ingredients for a Shelf That Stands the Test of Time
- Don’t skimp on the finish! Just as a light drizzle in the Swiss Alps adds character to a landscape, a high-quality sealant or wax protects your wood from the shifting humidity of your home, preventing those pesky cracks from appearing mid-journey.
- Mind the weight distribution! I’ve learned from carrying heavy sketchbooks across cobblestone streets that balance is everything; ensure your shelves are thick enough or reinforced with a center support so they don’t bow under the weight of your most cherished literary treasures.
- Level up your precision! A tiny tilt might not seem like much when you’re glancing at a bus schedule, but in woodworking, an uneven base can lead to a wobbling disaster; always use a spirit level to ensure your masterpiece sits as steady as a mountain peak.
- Secure it to the world! For the sake of safety—and to keep your collection as secure as a tucked-away village in the Pyrenees—always anchor your bookshelf to the wall, especially if you’re building something tall and slender.
- Embrace the “slow travel” approach to sanding! It’s tempting to rush to the finish line, but taking the time to sand through every grit ensures a surface so smooth it feels like a sun-drenched afternoon in Barcelona, making the final stain look absolutely divine.
The Final Destination of Your Craft
As we pull into the final stop of this woodworking adventure, I hope you feel ready to tackle your project with confidence. We’ve navigated the winding roads of material selection, weighing the sturdy grace of hardwoods against the approachable charm of softwoods, and we’ve mastered the intricate art of joinery to ensure your structure remains as steadfast as a mountain pass. Remember, building a bookshelf that truly lasts isn’t just about the precision of your measurements or the strength of your glue; it is about the deliberate choice to use quality materials and time-honored techniques that prevent the inevitable wobbles of time. By focusing on these core foundations, you are ensuring that your creation becomes a permanent fixture in your home rather than a fleeting stop along the way.
Much like the beautiful, weathered landscapes I sketch from my bus window, a well-made piece of furniture gains its true soul through the passage of years. Your bookshelf will eventually hold more than just paper and ink; it will carry the weight of your favorite memories, the stories of your travels, and the quiet magic of a life well-lived. So, grab your tools, trust your hands, and don’t be afraid of a little sawdust on your boots. Every notch and grain tells a story, and I cannot wait for yours to begin. Happy building, fellow travelers!